Installation Works
Installation of office and commercial PVC floor coverings
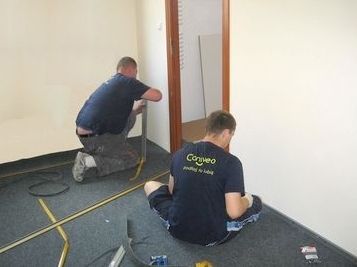
We have experienced and trained teams of installers who provide skilled and professional installation of floor coverings. Our work is always preceded by a non-binding and free visit at the installation site in order to measure the rooms and evaluate important factors affecting the work, for example: the condition of the old floor covering, the condition of the surface, the number and type of arches, slants and permanent objects, stairs. We are open to all requests and requirements from customers. At their request, we make even the most unusual installation of floor coverings, such as fancy patterns on the floor or floor coverings on the walls. We operate accurately, efficiently and on time. What is very important, we also work non-standard hours, i.e. outside office hours and on weekends. Thanks to this, we do not block rooms for longer than absolutely necessary, and our customers avoid downtime in the operations of their companies, schools, medical facilities, and offices. We have extensive references from completed investments.

What makes us stand out?
 Experienced service teams
 Professional installation
  Free visit at the installation site
  The most unique projects
 "There is nothing impossible to him who will try."
(Alexander the Great)
Installation stages
Hardly anyone is aware of the complexity of the floor covering installation process. Covering one small room may consist of up to 65 stages! Here they are...
I. Preparation of the surface
- Cutting the old floor covering into stripes
- Tearing off the floor covering
- Taking out the floor covering
- Sanding the surface from glue residues and torn off floor covering
- Vacuuming the surface
- Priming the surface
- Local filling of the surface
- Mixing the leveling mass in appropriate proportions
- Pouring the leveling mass onto the surface
- Spreading the leveling mass using squeegees
- Rolling out air bubbles from a freshly poured leveling mass using a spiked roller
- Sanding the surface using a sanding machine
- Vacuuming the surface with an industrial vacuum cleaner
II. Installation of the floor covering
- Unrolling the floor covering
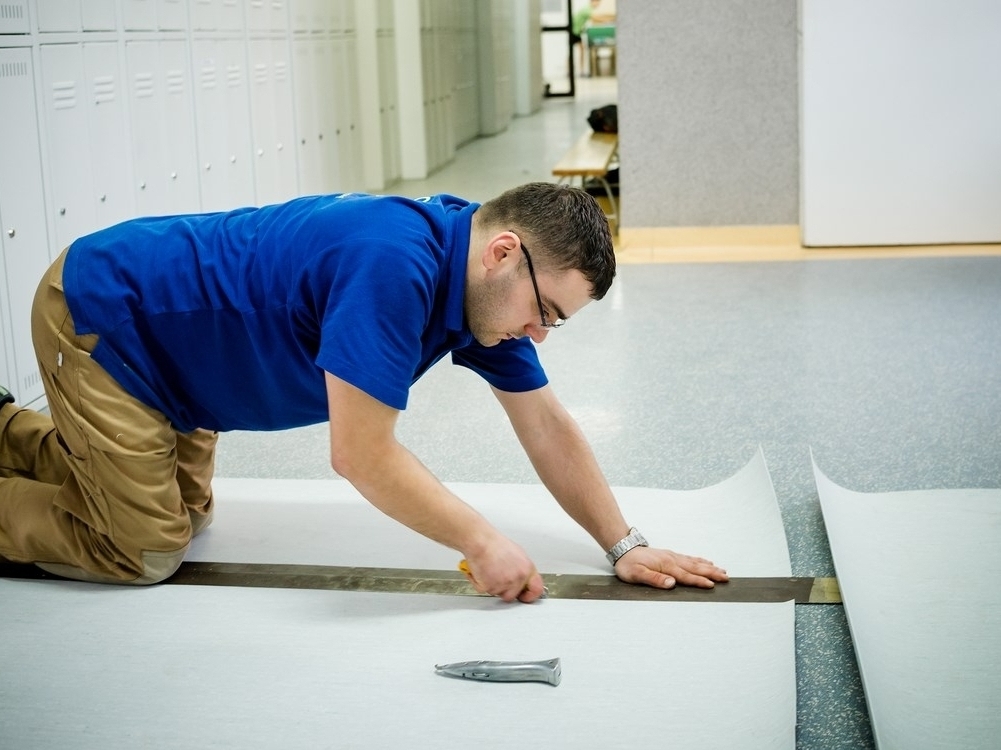
- Wall-to-wall cutting of the floor covering
- Placing one floor covering on another to make a joint
- Spreading flooring adhesive on the floor
- Laying out the floor covering from wall to wall
- Spreading flooring adhesive on the floor
- Cutting the floor covering in order to make a joint using a straightedge
- Pressing the floor covering down at the joints
- Rolling the floor covering and getting rid of air bubbles
- Vacuuming the surface of the floor covering
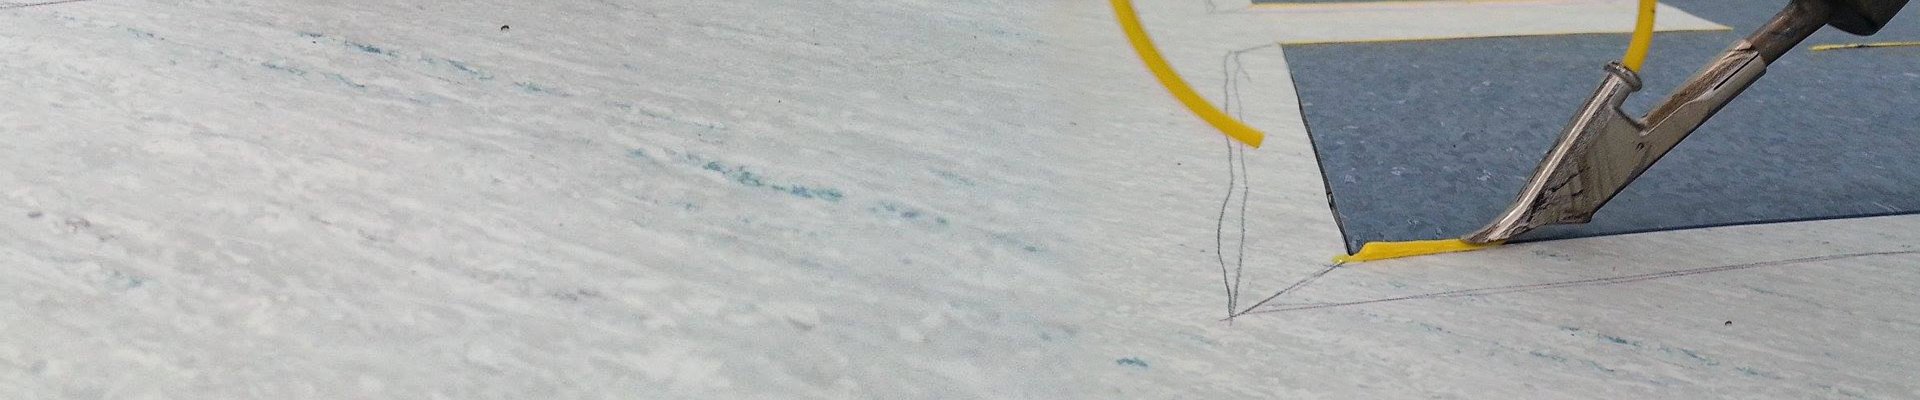
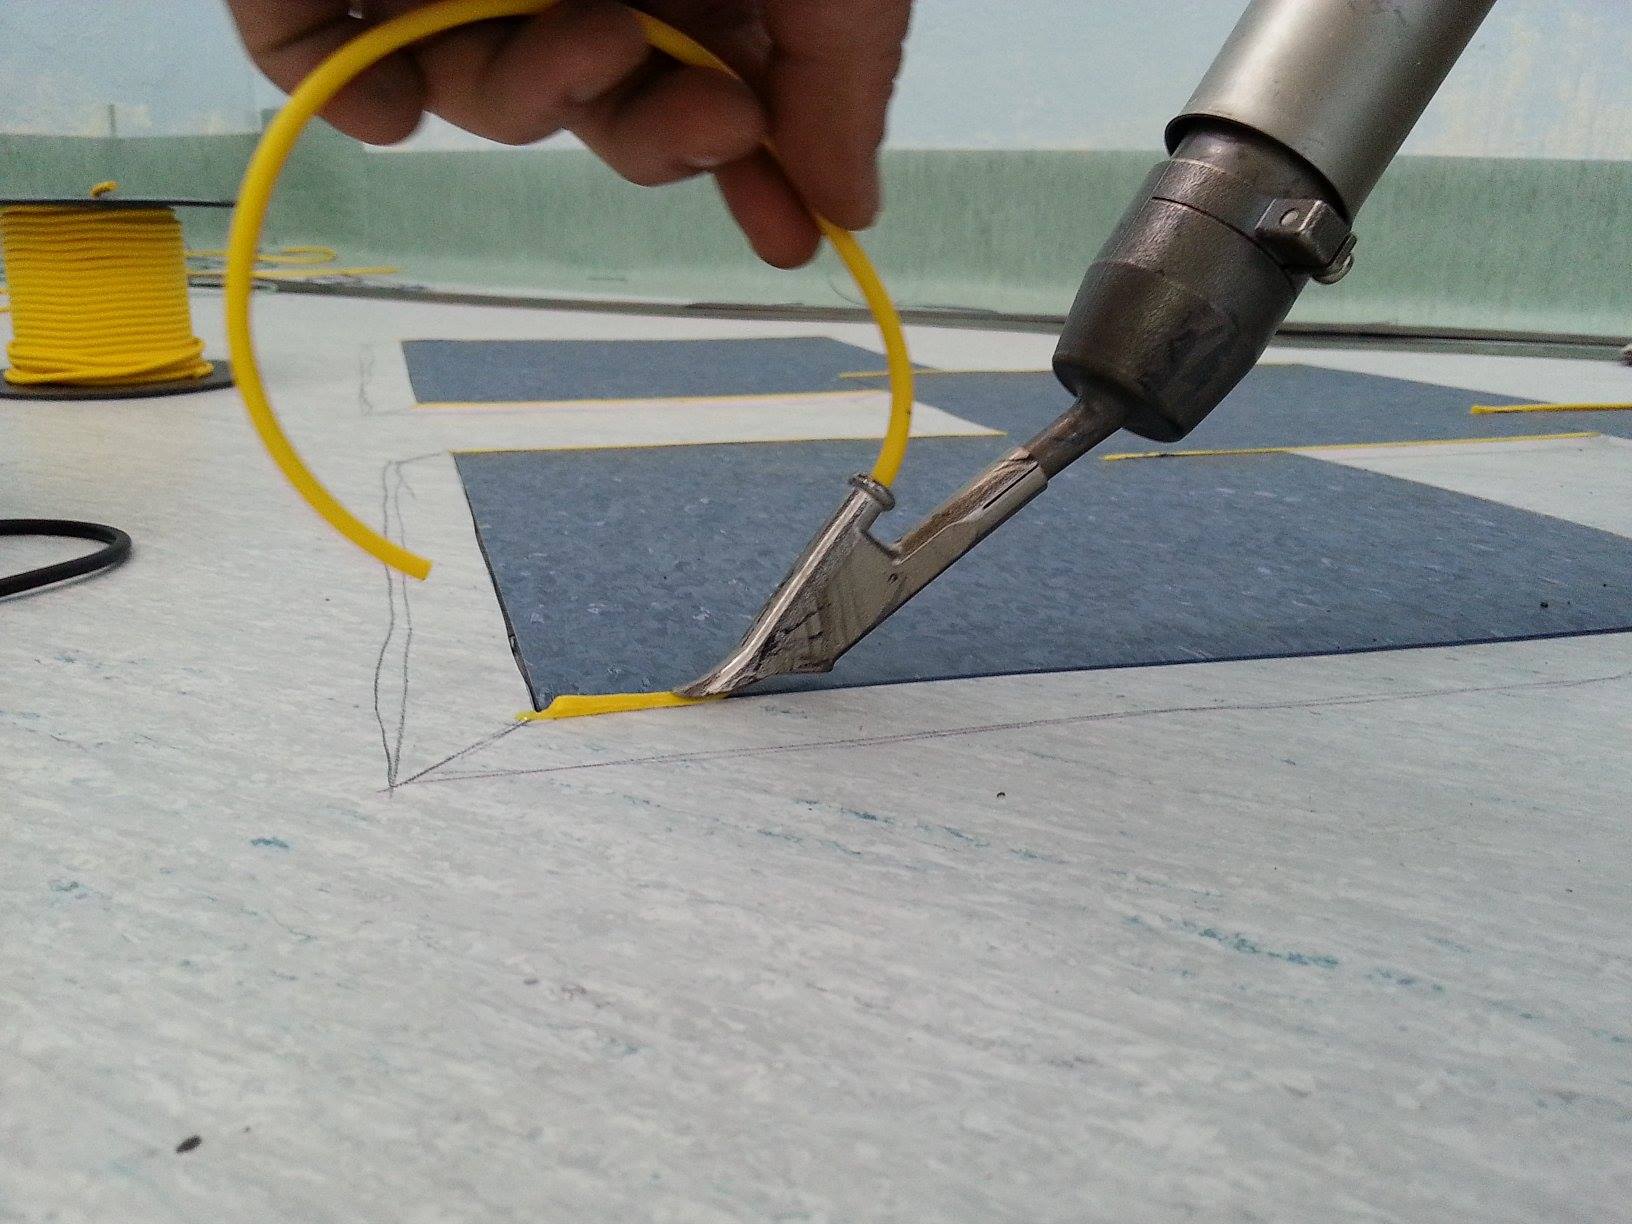
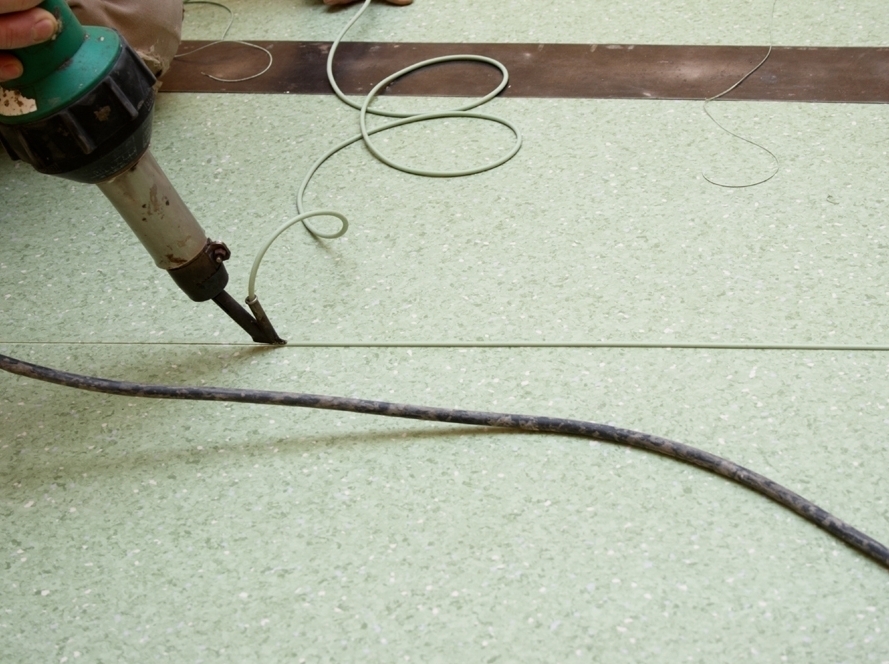
III. Hot welding of PVC floor covering
- Arranging two floor covering panels parallel to each other
- Milling of the floor covering (making grooves)
- Hot welding of the floor covering - fusing a rope into the connecting groove
- Cutting the fused rope to level - two times
- Cleaning the welding location
IV. Unrolling the floor covering onto the wall
- Drawing the desired height of the baseboard (usually 10 cm)
- Applying a layer of adhesive on the wall
- Gluing the floor covering to the wall
- Heating the floor covering with a heater so that it is more flexible
- Appropriately rounding the floor covering in order to maintain the right angle
- Making cuts in the corners: internal and external
- Milling the joints (making grooves)
- Hot welding of the floor covering - fusing a rope into the connecting groove
- Cutting the fused rope to level
- Cleaning the welding location
- Cleaning the adhesive from the baseboard
- Acrylic sealing of the floor covering-to-wall joint
V. Installation of carpet slats
- Laying out the slats to the walls
- Cutting the carpet slats to size
- Making holes in the walls
- Inserting expansion bolts into the holes
- Screwing the slat to the wall
- Installation of ends and corners at the ends of the slats
- Cutting extra floor covering strips
- Tearing off the tape protecting surfaces with glue
- Filling the slats with floor covering strips
- Pressing down the strips in the slat
- Acrylic sealing of the floor covering-to-wall joint
VI. Installation of the threshold strip
- Measurement of the strip
- Cutting the aluminum threshold strip to size
- Making holes in the floor
- Inserting expansion bolts into the holes
- Screwing down the threshold strip
VII. Acrylic sealing of the PVC floor covering
- Vacuuming and cleaning the surface
- Pouring the ripping agent
- Spreading the ripping agent
- Mechanical removal of old protective layers and dirt
- Collecting the ripping agent
- Washing the surface with clean water
- Applying the 1st layer
- Applying the 2nd layer
- Applying the 3rd layer
- Hardening of the layers by polishing

It should be noted that we have the specialist equipment necessary for installing floor coverings (e.g. welding heater, floor sander or sets of special cutting tools) and all accessories (like adhesives, skirting boards and thresholds, staircase profiles, installation adhesives, smoothing and repairing materials for surfaces, and many others). The set of equipment and accessories we need to collect to set off to work is a cost of at least PLN 30,000. Plus, you need to add to this a specially prepared car.