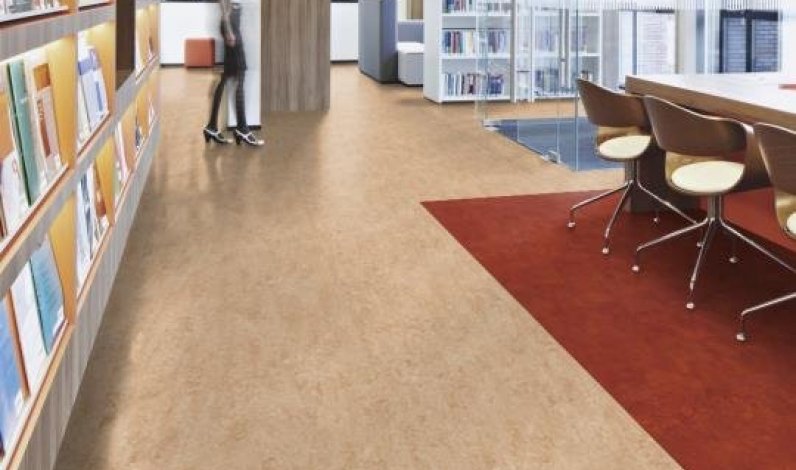
What is linoleum? How is it installed and what are its advantages?
Linoleum is a mixture of wood flour, linseed oil, resins, limestone and pigments compressed with a backing of natural jute. All raw materials used in the production of linoleum are of natural origin. These floor coverings are considered to be among the healthiest and most hygienic of all so-called 'flexible' floor coverings. They are very durable, resistant to damage (not even the heat from a cigarette can destroy them) and scratches, and are an interesting alternative to PVC or wood products.
Linoleum has many advantages - it is warm, resilient, difficult to fall on (even when wet, it is not slippery) and is therefore recommended for rooms used by children, who like to play on the floor and often run around barefoot.
It can be laid in the homes of people with asthma, thanks to its high resistance to dirt and high ease of cleaning. Linoleum also has antimicrobial and bacteriostatic properties - micro-organisms do not develop on its surface, which makes it one of the hygienic floors. For these reasons, linoleum is increasingly sought after by users looking for a healthy, natural floor. It should not be confused with flexible polyvinyl chloride (PVC) flooring, as these are completely different types of flooring. Linoleum is more durable than these, and also ages differently - it becomes harder over time, resulting in a lifespan of up to several decades. It can be used over underfloor heating and is more expensive than PVC flooring.
Linoleum is subject to oxidation. This has its advantages as well as disadvantages. Any scratches that appear on the surface of the carpet will heal over time and become invisible. The same oxidation also has an effect on the colour of the floor covering, which takes on a slightly different shade over time, which is why when choosing linoleum from a linoleum supplier it is better to choose from a sample rather than a freshly rolled roll.
Linoleum flooring can be decorated with coloured borders and decorations. When choosing this floor covering, try to match the width of the roll to the maximum width of the room due to the necessity to join the individual linoleum pieces by heat using a special cord. Homemade seams will not look good, and for professional seaming of linoleum pieces there are special seaming machines available only to specialists.
Brief instructions for installing linoleum:
- Before installing linoleum, check the batch numbers to avoid differences in shades (you should choose a linoleum from the same production batch for the same room).
- The substrate for installation should be: permanently dry, durable, rigid, uncracked and smooth.
- Before installation the floor covering should be stored vertically in the room for approx. 24 hours in order to absorb a room temperature of min. 18ºC; substrate min. 17 ºC.
- Always test the moisture content of concrete substrates, regardless of their age or concrete grade.
- The moisture content of the concrete substrate must be determined using the CM method. The moisture content must not exceed 2% CM.
- If the moisture content of the concrete substrate exceeds the required values, follow the manufacturer's instructions
Installation:
- After 24 hours of acclimatisation, cut the carpet sheets. Using a suitable trowel with a toothed comb, spread the adhesive over the entire line-designated substrate.
- Use dispersion adhesives (water-based) to glue the floor covering onto the substrate. For skirting boards - contact adhesive (cover both the wall surface and the carpet with it and allow the adhesive surface to dry).
- After spreading the adhesive with a B1 comb trowel (on wet adhesive) press the floor covering to the substrate, then using a roller of min. 60kg remove air from under the covering (first across, then along the sheet).
- Then repeat the operation on the other half of the sheet.
- For wall-to-wall installation press the carpet down with a pressure roller so that it adheres to the wall-floor junction.
- Carry out the inside corner so that the cut and joint is at the junction between the two walls.
- Carry out the outside corner in the same way, joining vertically.
- After all cutting and processing work has been carried out, glue the base with contact adhesive.
- After 24 hours the "carpet welding" work can be started.
- The permissible deviation of the floor surface from the horizontal plane should not exceed 2mm/m and 5mm over the entire length or width of the room.
- Once the adhesive has had sufficient time to dry after installation (approx. 24 hours) the carpet can be heat welded. Only use a welding rope recommended by the manufacturer of the respective material. Do not use chemical welding.
- A professional finish can be achieved by using finishing products such as floor trims, stair nosings and transition profiles.


